How to Properly Check Button Battery Toys: A Comprehensive Safety Guide
Introduction
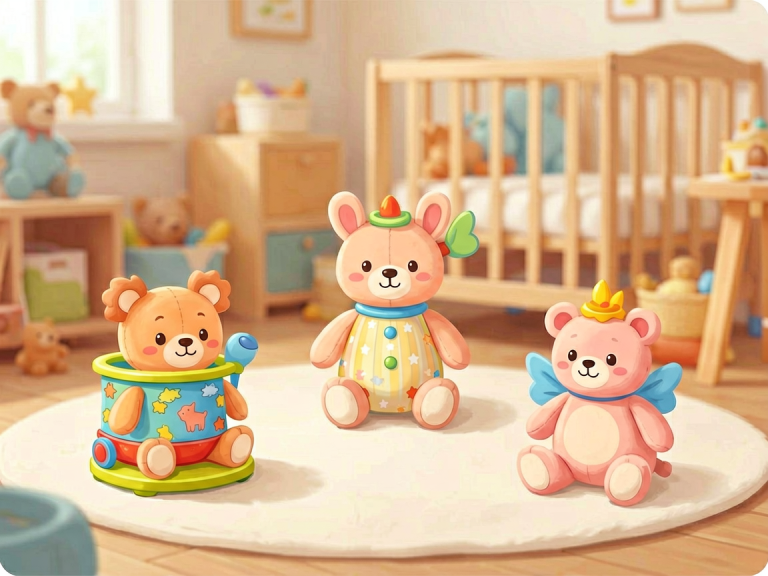
Button batteries, those small, shiny, coin-shaped power sources, have revolutionized the toy industry. They power everything from singing plush animals to flashing light-up wands, making playtime more interactive and entertaining. However, these seemingly harmless components pose a serious hidden danger, especially to young children. Every year, thousands of emergency room visits are linked to button battery ingestion, which can cause severe internal burns, choking, and even death within just two hours. The good news is that with proper knowledge and a systematic checking routine, parents and caregivers can significantly reduce these risks. This comprehensive guide will walk you through exactly how to check button battery toys, ensuring that the toys in your home remain safe, fun, and free from hidden hazards.
Why Checking Button Battery Toys Is Critical
Before diving into the step-by-step process, it is essential to understand why a simple visual inspection is not enough. Button batteries are often housed inside toys in compartments that may appear secure but can become loose over time due to wear and tear, accidental drops, or manufacturing defects. A toddler’s curious fingers can pry open a poorly designed battery door in seconds, giving them direct access to a battery that can be swallowed or inserted into the nose or ear.
The danger is not just about choking. When a button battery lodges in the esophagus, it creates an electrical current that generates sodium hydroxide, a caustic substance that burns through tissue. The damage can be catastrophic and is often not immediately visible. Therefore, checking button battery toys is not a one-time task—it must be done regularly, especially with toys that are frequently used, passed down from older siblings, or bought second-hand.
Step 1: Locate the Battery Compartment
The first step in checking any button battery toy is to physically locate its battery compartment. Many toys hide the compartment behind a fabric flap, under a removable hat, or inside a plastic casing that blends seamlessly with the toy’s design. You need to examine the entire toy, including all seams, joints, and hidden pockets. If the toy is a soft plushie, check its label tags, seams, and any zippered sections. For hard plastic toys, look for a small plastic hatch, often on the bottom or back.
Once you have found the compartment, do not open it immediately. Instead, observe how the compartment is secured. Is there a visible screw? Is it a simple snap-fit door? Or is it a sliding panel? Understanding the type of closure will inform the rest of your inspection. For instance, a screw-secured compartment is generally safer than a snap-fit one because it requires a tool to open, making it more child-resistant.
Step 2: Inspect the Screw and Cover
If the battery compartment uses a screw, it must be a Phillips or Torx screw, and the screw must be tightly fastened. Many toy manufacturers now require a screw that is not easily removed with common household tools available to children. Even a loose screw can be turned by a child using a coin or a butter knife. Therefore, after locating the screw, check if it is stripped, rusted, or missing. A stripped screw may fail to hold the cover firmly in place after repeated openings.
Next, examine the plastic cover itself. Is it cracked or warped? Does it fit flush against the toy’s body? Any gap between the cover and the toy could allow a child to wedge a fingernail or a small object and pry it open. Run your fingernail along the edge of the cover. If you feel any raised edges or unevenness, the cover may be compromised. If the cover is held by a snap mechanism, press on it firmly to ensure it does not pop open with light pressure. In many older or cheaply made toys, the plastic latch breaks after a few uses, rendering the compartment unsafe.
Step 3: Check for Signs of Damage or Wear
Now, open the compartment using the appropriate tool (e.g., a screwdriver for screw compartments, or gently prising open snap compartments if necessary). Once open, carefully remove the batteries and set them aside on a safe, non-conductive surface. Inspect the interior of the compartment for any signs of corrosion, leakage, or foreign objects. Corrosion appears as a white, blue, or green powdery substance on the metal contacts. This is not only a sign of battery aging but also a chemical hazard. If the battery has leaked, the toxic electrolyte can cause skin burns and should be handled with gloves.
Also look for any signs that the toy has been dropped, crushed, or otherwise damaged. A cracked plastic housing around the battery compartment could create a sharp edge that weakens the seal. In plusher toys, check if the internal wiring or battery harness has been frayed or exposed. Even a tiny tear in the fabric near the battery pocket can become an entry point for tiny fingers. If you find any damage, stop using the toy immediately and dispose of it safely according to local electronic waste guidelines.
Step 4: Test the Battery Fit and Security
With the batteries out, examine them individually. Are they the correct size? Many toys specify the battery type (e.g., CR2032, LR44) in the manual or on the back of the toy. Using a battery that is too small can allow it to rattle inside the compartment, making it easier for a child to shake it out. Conversely, forcing an oversized battery can crack the compartment walls. Replace any batteries that show signs of swelling, dents, or corrosion.
Now, before reinstalling the batteries, test the security of the battery contacts. The positive and negative terminals should be firm and should grip the battery snugly. If the contacts are bent or loose, the battery may not stay in place. Some toys have a foam pad or a plastic clip that presses the battery down. Verify that this compression mechanism is still intact. For toys that use multiple batteries in series, check that the orientation is clearly marked and that there is no cross-contact between terminals that could cause a short circuit.
After reinstalling the batteries, close the compartment and test the locking mechanism one more time. Try to open the door with your bare hands without using any tools. If you can pop it open with moderate finger pressure, it is not safe for a child. A good test is to squeeze the toy firmly around the compartment area—if the door pops off, the toy is unsafe. Many regulatory standards require that a child-resistant battery compartment cannot be opened with a force of less than a certain newton value, but as a caregiver, the hand-tight test is a practical benchmark.
Step 5: Verify the Child-Resistant Mechanism
Not all toy manufacturers comply with the same safety standards. In the United States, the Consumer Product Safety Commission (CPSC) requires that toys for children under three years old have battery compartments secured by a screw or a tool-required mechanism. For toys for older children, snap-fit compartments are allowed but must be strong enough to resist opening without significant force. However, even compliant toys can fail over time.
To thoroughly verify child resistance, try to open the compartment using common household items that a child might have access to, such as a coin, a spoon, a pair of scissors, or a paperclip. If you can open it with any of these tools in under 30 seconds, the toy is not adequately protected. This step is often overlooked by parents who assume the screw or latch is sufficient, but children are remarkably resourceful. Some experts recommend using a “button battery testing tool” (a simple wedge gauge) to measure the force required to open the compartment, but for home use, the practical test is adequate.
Also, check the manufacturer’s label for any warning about button battery safety. Reputable brands often print a warning on the packaging or directly on the toy. If the toy lacks any such label, it may be an older model or a counterfeit that does not meet current safety standards. In that case, consider retiring the toy or reinforcing the compartment with strong tape that cannot be easily peeled off by a child. However, tape is only a temporary measure—the safest option is to replace the toy.
Common Mistakes to Avoid
Even experienced caregivers can make errors when checking button battery toys. One common mistake is focusing only on the main toy while ignoring accessories. Many toys come with remote controls, microphones, or additional interactive parts that also contain button batteries. For example, a toy guitar may have a separate battery-powered pick. Each component must be checked independently.
Another mistake is assuming that a toy that passed an initial check remains safe forever. Batteries degrade, plastic ages, and screws can loosen from thermal expansion and repeated use. Set a recurring reminder to check all battery-powered toys at least once a month. Additionally, never assume that a toy is safe just because it is new or expensive. Even premium brands occasionally have recalls related to battery compartment failures. Check the CPSC recall database periodically for any toy models you own.
A third common oversight is disregarding toys that are “battery-free” or seem to require no batteries. Some toys, especially musical ones, may have a hidden battery compartment behind a decorative sticker or inside a sewn pocket. Always read the instruction manual thoroughly, even if you think you know how the toy works. If the manual mentions batteries, find the compartment and inspect it.
Additional Safety Measures for Parents
Beyond the specific steps above, adopting a few broader safety habits can further protect your children. First, store all spare button batteries in a locked cabinet or container that is completely inaccessible to children. A single loose battery in a junk drawer can be just as dangerous as one inside a toy. Similarly, dispose of spent batteries immediately, and never leave them on a countertop or in a trash can that a child can reach.
Second, educate older siblings and babysitters about the dangers. Sometimes the greatest risk comes not from the toddler themselves but from an older child who replaces a battery incorrectly or leaves the compartment open. Make it a rule that only an adult is allowed to change batteries in any toy. Also, teach children that button batteries are not toys—they should never touch or play with a loose battery, and they should immediately tell an adult if they find one.
Third, consider using “battery lock” devices or childproofing tape specifically designed to secure battery compartments. These products are available online and can add an extra layer of protection for toys that have inherently weaker compartments. However, remember that these are supplementary measures; they do not replace a thorough initial check.
Finally, if you ever suspect that a child has swallowed or inserted a button battery, do not wait for symptoms to appear. Head to the emergency room immediately. Do not induce vomiting, and do not let the child eat or drink anything until a medical professional can assess the situation. Time is critical, and a prompt X-ray can confirm the location of the battery.
Conclusion
Checking button battery toys is not just a routine chore; it is a life-saving habit that every parent, grandparent, and caregiver must develop. By following the five-step process outlined in this guide—locating the compartment, inspecting the screw and cover, checking for damage, testing battery fit, and verifying child-resistant mechanisms—you can dramatically reduce the risk of accidental ingestion or injury. Remember that no toy is truly “childproof,” but with vigilance, you can make it significantly safer. The few minutes you spend examining each toy could prevent a tragedy that would otherwise change your family forever. So take action today: gather the button battery toys in your home, perform a comprehensive check, and rest easier knowing that you have done everything in your power to protect your little ones. Safety is not a one-time event—it is an ongoing commitment. And when it comes to button batteries, that commitment can mean the difference between a joyful childhood and a devastating emergency.